

-320x320.jpg "MIG/MAG Welding Machines")
-320x320.jpg "TIG AC/DC Welding Machines")




-320x320.jpg "Electrodes for High-Alloy Steel")
-320x320.jpg "Surfacing Electrodes")
-320x320.jpg "Electrodes for Cast Iron")









-320x320.jpg "Welding Masks")




-320x320.jpg "Welding Machine Carts")






How to weld with a MIG welder: tips for beginners
Published:
20/07/2026
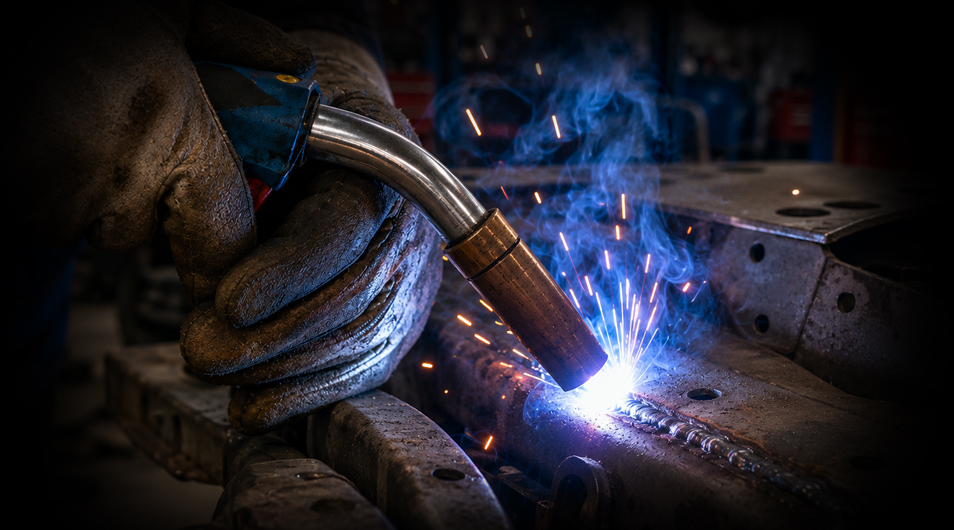
How to weld with a semi-automatic welding machine is one of the first questions for those switching from MMA to MIG/MAG welding. A semi-automatic machine is easier to master, produces an even weld, and allows faster work, but quality depends on settings and technique. It is important to understand how to weld correctly with a semi-automatic welding machine in order to achieve stable penetration, avoid overheating the metal, and reduce spatter.
Semi-automatic welding is suitable for repair, assembly of metal structures, bodywork, and the production of gates, frames, and tanks. The machine feeds welding wire automatically, while the welder controls the torch, arc position, and weld pool formation.
What MIG/MAG semi-automatic welding is
MIG/MAG semi-automatic welding is a process in which wire is continuously fed into the arc zone and melts together with the base metal. In MIG mode, argon or its mixtures are usually used, while in MAG mode, carbon dioxide or a mixture of argon and CO2 is used. Shielding gas protects the weld pool from oxygen and helps produce a clean weld.
The main feature of the method is automatic filler feeding. The welder does not change electrodes as in MMA, but guides the welding torch along the joint. That is why MIG/MAG is convenient for long welds, thin sheet metal, serial work, and tasks where repeatability is important.
For such work, MIG/MAG semi-automatic welding machines with current, arc voltage, and wire feed speed adjustment are used. The more accurately the machine maintains the parameters, the easier it is to control the pool.
How to set up a semi-automatic machine before welding
Before starting work, the machine, gas, wire, and part must be prepared. The surface is cleaned of rust, paint, oil, and moisture because contamination causes porosity and an unstable arc. It is also important to check the ground clamp, contact tip, rollers, and hose package.
Basic preparation includes several steps:
- install welding wire suitable for the material and part thickness;
- check the rollers, feed channel, and torch contact tip;
- connect the shielding gas and set the flow rate;
- choose the correct polarity for the wire;
- set the welding current, arc voltage, and wire feed;
- make a test weld on similar metal.
After the test pass, the arc sound, bead shape, penetration depth, and amount of spatter should be evaluated. If the weld is uneven, the metal burns through, or the wire pushes into the part, the settings should be adjusted before the main work.
Polarity setting
Polarity depends on the type of wire. For standard solid wire in a gas shield, reverse polarity is most often used: the torch is connected to the positive terminal, and the ground clamp to the negative terminal. This setup provides a stable arc and normal metal transfer.
If self-shielded flux-cored wire is used, the requirements may differ. Some types require straight polarity, so the manufacturer’s recommendations must be checked. Incorrect connection worsens penetration, increases spatter, and makes the arc unstable.
Gas and wire feed setting
Shielding gas is selected according to the material and task. For mild steel, carbon dioxide or an argon and CO2 mixture is often used. Argon is used for aluminum, while special gas mixtures are used for stainless steel. Too low a gas flow causes porosity.
Wire feed must match the current and metal thickness. If the speed is too low, the arc becomes long, the weld is narrow, and penetration is weak. If the feed is too high, the wire pushes the torch, spatter appears, and the bead becomes uneven.
Current and voltage setting
Welding current affects the amount of molten metal and penetration depth. Arc voltage determines arc length and weld width. The thicker the metal, the higher the current and feed usually need to be, but the part must not be overheated.
For beginners, it is better to select the mode on a test plate. A good arc sounds even, without sharp popping or breaks. If the bead is high and narrow, there may not be enough voltage. If the weld is too wide, heat input should be reduced.
Semi-automatic welding technique
To understand how to weld with a semi-automatic welding machine in practice, it is necessary to keep the same distance from the nozzle to the metal and guide the torch without jerks. Too long a wire stick-out makes the arc unstable, while too short a stick-out increases the risk of sticking and nozzle contamination.
The torch is held at a slight angle to the direction of travel. For thin metal, it is more convenient to move faster so as not to overheat the edges. For thick parts, movement is slowed down while controlling the weld pool and joint filling.
There are several signs of correct technique:
- the arc burns steadily and does not break;
- the weld pool does not spread too widely;
- the bead is uniform in height and width;
- there is little spatter, and the nozzle does not clog too quickly;
- penetration matches the part thickness;
- after cooling, there are no pores, burn-throughs, or visible undercuts.
After each section, the weld should be inspected. If defects appear, it is better to immediately change travel speed, voltage, or feed than to continue working with the wrong mode.
How to weld thin and thick metals with a semi-automatic machine
Thin metal requires low heat input and careful movement. It is important not to hold the torch in one place, otherwise burn-through will appear. For bodywork and sheet metal, short tack welds or welding in small sections are often used.
Thick metal requires good penetration and edge preparation. If the part is massive, beveling, several passes, and higher welding current may be needed. At the same time, the weld pool must remain controllable, otherwise the weld will be overheated.
If you need to understand how to weld correctly with a semi-automatic welding machine on parts of different thicknesses, do not rely only on the settings table. It is important to watch how the metal behaves. With a good mode, the arc is stable, the pool follows the torch, and the bead fuses with the edges.
Multi-pass welding is used for thick workpieces. The first pass forms the root, and the next passes fill the groove and strengthen the joint. Between passes, spatter and contamination are removed to avoid porosity.
Common mistakes in semi-automatic welding
Beginner mistakes are most often related to settings and poor surface preparation. Even a good semi-automatic machine will not produce a quality weld if the metal is dirty, the ground clamp is poorly attached, and gas flow is unstable.
A common mistake is too high a travel speed. In this case, the weld is narrow, penetration is weak, and the edges may not fuse. If the torch is moved too slowly, the metal overheats, burn-throughs, deformation, and spatter appear.
Another problem is an incorrect combination of arc voltage and wire feed. With low voltage, the wire pushes into the pool, while with excessive voltage, the arc becomes long and unstable. Therefore, the settings must be selected together.
Beginners should also monitor consumables. A worn contact tip worsens current transfer, a contaminated nozzle disrupts gas shielding, and unsuitable rollers damage feeding. If flux-cored wire is used, check the polarity and mode.
Summary
How to weld correctly with a semi-automatic welding machine depends on metal preparation, gas selection, polarity, wire feed, current, voltage, and torch handling technique. To achieve a stable weld, start with test passes, control the weld pool, and adjust the parameters according to the part thickness.